250 Carbon Fibre Quad Build
I recently downsized from my 450 quad to a ZMR 250 unit. 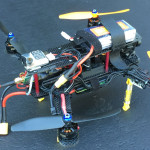 The purpose of this post is not so much of a step-by-step but rather a collection of tips, suggestions and lesson’s learned to help should you go down a similar avenue to build your own quad. There are plenty of video’s and how-to’s out there once you know what set-up you want to go with. I will reference mine as well as others as I document this. The purpose of this post is to chronicle my build as it evolves. Hopefully I can share some of the lessons learned, ideas and new ideas to help you with your build.
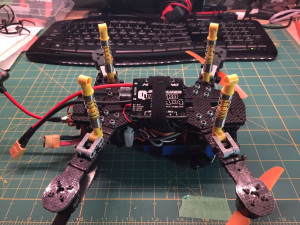
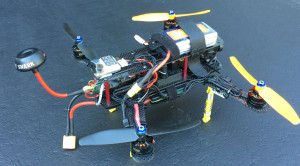
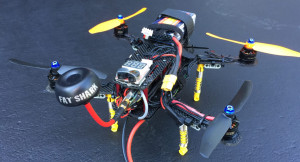
I re-purposed some bits from the 450 unit, and picked up the rest from various suppliers. The set-up I went with includes the QAV250 carbon fibre frame, Flip32+ (Naza clone) 10 DoF flight controller, FrySky TX/RX CPPM Telemetry units, Hobbywing Skywalker 4in1 ESC controller, FatShark FPV, MicroMinim OSD and DYS 2300KV motors. This is a great combination of components.
Parts:
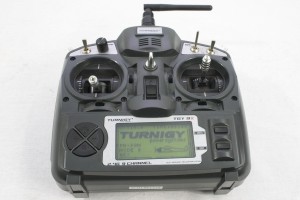
Update: July 2015: I wanted longer range from my TX/RX, CPPM on my receiver as well as to pass telemetry from the Flip32 through the MicroMinimOSD. I replaced the FlySky receiver and transmitter with the below 2 items. I also modified my Turnigy 9x TX with the DIY FrySky transmitter module (details further down):
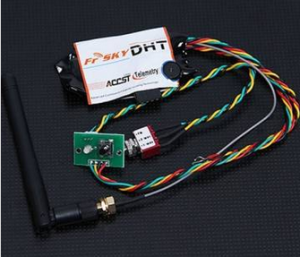
- FrSky DHT 8CH DIY Compatible Telemetry Transmitter Module
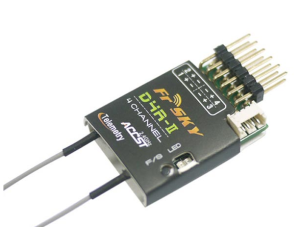
- FrSky D4R-II 2.4G 4CH ACCST Telemetry Receiver
Base Configuration:
- FlySky 2.4G 9CH Transmitter FS-TH9XB
- Micro MINIMOSD (enables OSD for FPV) – this is the tiny 15x15mm version.
- FS-R6B FlySky 2.4Ghz 6CH receiver for RC FS-CT6B TH9 25 grams (You don’t need this if you go with the FrySKy TX/RX above)
- Lion Power 11.1V 1500mAh 35C LiPo Battery BT687 108 grams (you will want at least 2 batteries)
- Flip32+ Flight Controller With 32-bit STM32 10Dof or… MWC MultiWii SE V3.0 Flight Controller Board Standard Edition 14 grams
- Hobbywing SkyWalker 25A 4 In 1 Brushless ESC Speed Controller 118 grams
- 10x 3.5mm Gold Bullet Banana Connector Plug For ESC Battery Motor
- DYS BE1806 2300KV Brushless Motor Black Edition for Multicopters 26 grams
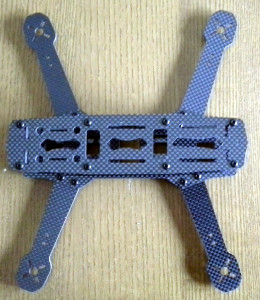
- QAV250 250mm Mini FPV Quadcopter Carbon Fiber Frame Kit QAV250 151 grams
- Gemfan 5×4 5040 Propellers CW/CCW For QAV250 Black & Orange 5 grams / pair
- Gemfan 5×3 Inch Plastic 5030 Propeller CW/CCW For 240 250 Frame 5 grams / pair
- FPV Camera Tilt Servo
The QAV250 Frame:
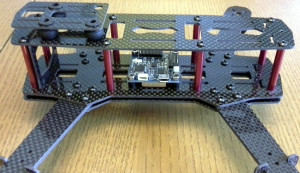
After putting things all together I am generally really happy with the 250 size frame. The unit is the real deal (carbon fibre). Sometimes buying from overseas retailers can result in shady experiences (i.e CF laminate over fibreglass), but this is the real deal. Tip – to check if you have a true CF frame you can use a voltmeter. Take the part in question, put your voltmeter in resistance mode, put the probes at opposite ends (on the sides not the surface) and read the resistance. If it’s truly CF, you will have some or very low resistance (as cf is conductive). If it’s not CF, there will be infinite resistance.
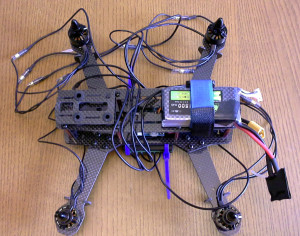
The only (slight) gripe I have about this frame is that it is hard to cram all the bits on the space provided. I blame myself for wanting to take on so many features (FPV, OSD, servo controlled tilt etc). That said, I think I’ve found a sweet spot of optimization. The frame is strong and light and worth the cost (think it was approx $28 CAD).
The Flip32+ Controller:
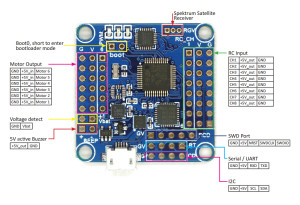
I’m quite happy with the Flip32+ controller. Tip – when buying this unit, be careful as there are 2 versions 10DoF (Flip32+) or 6DoF versions. The 10DoF simply has more sensors (i.e. the Magnometer, Barometric sensor etc). Also, there were a run of these units that had a manufacturing glitch where the micro USB connector was poorly soldered at the main mounting points. This was a cause for disappointment for many who found the USB port breaking off after the first few times of plugging it in. I’ve had good luck with mine, but added additional solder and some goop (my fav glue) around the entire connector and onto the main board to hold it tight. This sucker should be on there for good now. Tip: Yours will likely come without pins soldered. You have 2 options – straight and 90 degree angle header pins. Straight will have all connections come in from the top. The 90 degree header allows for connectors to come in from the sides. I have straight and am fine with it. You will want to plan your component placement and wiring before deciding. You can always get 90 degree headers separately, but order them at the same time you get the Flip.
Cleanflight – Controller Software:
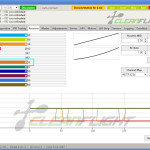
I switched from MultiWii to Cleanflight. MultiWii is great platform for configuring your flight controller, but Cleanflight has been making a lot of traction lately. Since I never leave well enough alone, I decided to try something different. The Cleanflight interface is easy to use and there are lots of videos and instructions on how to set it up and configure your controller. RCJose has a series of videos on YouTube that provide lots of info on how to set-up and configure the Flip32 with Cleanflight.
Tilt Enabled FPV Camera:
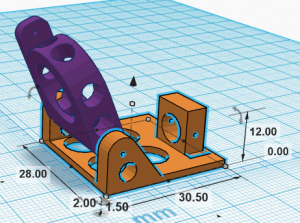
After flying FPV for a bit with the camera fixed to the 250 frame I found myself struggling while flying as I pitched the quad forward and reverse. Going from looking at the ground then to the sky as the quad pitched to-and-fro was driving me nuts. I found myself tilting my head fwd and back (probably a noob thing). I imagine that this is something the pro’s get used to, but I wanted something in between. I came across this post and followed the instructions. It was easy to set-up in Cleanflight and essentially includes setting up Servo Tilt, connecting the servo and adjust the ranges. You can even use the Gear switch on your TX to enable/disable the tilt function. I found the smallest lightest servo I (Hitec HS-35HD) ( or one for a great price – EMAX ES9251) could find as I wanted to keep it light and minimize the space of the set-up. I printed the camera and servo mount unit (see below pic). The whole package fits in half the space of the front of the 250 frame which leaves me room for other bits. The servo mounts to the backside of the pillar shown to the right. I used a small paperclip for the connecting wire between the servo arm and the camera mount unit. The video below shows this (but the quality is not that hot)
Download the camera mount and baseplate STL files for printing. (remove the .txt extension).
The FrySky Telemetry TX/RX
Don’t know yet as I have not gotten these in the mail yet. Will update once I have a chance to set them up. Plans include flashing the RX with the firmware fix that brings 18ms loop timing (Google for details on this). Apparently there were issues if you wanted to use 8 channels in CPPM mode. There is not enough duration in the cycles for all 8 channels. (wondering what test engineer missed that one?). Imagine that sort of goof on a NASA mission. “Umm, sorry sir, the shuttle’s steering controller will only let you go forward, left, right and back, but not flip. You are going to have to come in cockpit-side facing Earth. It might get hot in there..”
The 2300KV Motors
Nothing really special here. This size motor is pretty standard for 250 quads. As I get better at flying, I am getting a sense however that these units could be more powerful. Great little motors though. I fly with 5030 props. I have recently bought some 5040 units and will be tested them out soon. For those that are green on this as I once was. the “50” bit refers to the length (5 inches), the “30” or “40” bit refers to the pitch angle. 30 or 40 degrees. Tip – if you go with these motors you will have a challenge as most ESC’s use 3 mm wiring but these suckers are 2 mm. I picked up bunch of 2 mm bullet connectors and re-soldered all the connectors to drop them down to the DYS 2mm wire sizing. A bit of a pain, but fine if you are comfortable soldering.
The 4in1 ESC
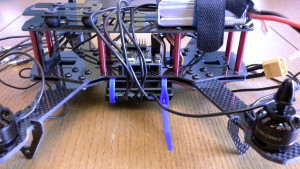
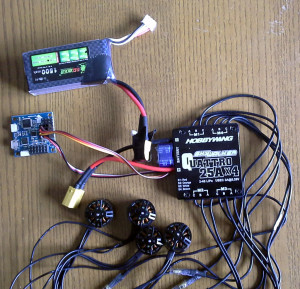
I used the 20Ax4 Quattro unit in the 450 quad and was impressed with it. So I went with the 25Ax4 unit below. It’s easy to set-up with the controller and easy to mount. I mounted mine on the underside of the 250 frame, and then run the wires up and around each arm to the motors. Connecting it to the ESC is simple. One connector contains Signal (think it’s Motor 1), +5V and GND , then the remaining 3 connectors are Signal for Motors 2, 3 and 4. Just make sure you only connect one 5V/GND to the Flip. The remaining connectors should only be signals. This provides power for the Flip as well as all 4 motor signals. You can also solder another power lead to the LiPo connector positive to connect to the Flip voltage detect pins (see above). You don’t need to bring GND up as it is already there from the motor connector. This allows you to read your main LiPo voltage in Cleanflight and on your OSD or other Telemetry system. The Quattro unit also has extra pads to solder connectors to get voltage from. This is good if you want to use an separate BEC to power other components.
Landing Gear:
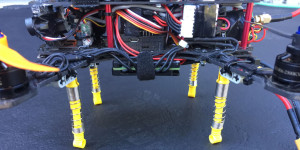
I have also been toying around with different landing gear ideas. Having a LEGO background, the idea of using LEGO Technic shocks came to me recently. Details on that set-up here. They can easily be retracted for storage. Pics are also below.
Turnigy 9x Mod – Adding the DIY FrySky Telemetry TX:
The original Turnigy 9x Transmitter does not come with a CPPM-enabled transmitter. I wanted to get CPPM enabled to get more channels through as well as to enable telemetry. I upgraded my 9x (which is a great TX) with the FrSky DHT 8CH DIY Compatible Telemetry Transmitter Module and FrSky D4R-II 2.4G 4CH ACCST Telemetry Receiver. I followed Bruce’s approach with a few small changes to where the binding switch was located. Check out the RCModelReview video here.
“Reminder Notes”
Sometimes I blog solely for the purpose of remembering how I set something up, and put content and pics to document it. I figured it would kill two birds with one stone to both help myself as well as others who want to try the same.
- Uploading Cleanflight Firmware – first time – Arduino – set board as “Arduino Pro or Pro Mini“
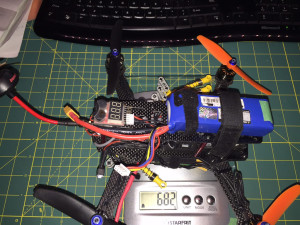
- Weight including FPV gear: 525 grams with 1500 mAh battery
- Weight including FPV gear: 682 grams with 2200 mAh battery + LEGO Technic landing gear (26 grams)
Current State – As of Aug 2015
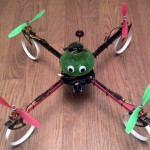
It seems that I am in a constant state of change with this quad. Here is where I am at as of Aug 2015. I’m waiting on the FrySky DIY kit + RX as well as the MicroMinim OSD unit which will allow me to get OSD on my FatSharks. I’ll update this when I get that done. The current set-up includes the FatShark 600TVL custom auto-tilt camera, Flip32+ controller, Hobbywing 4in1 ESC and2300KV motors.


Comments: